Power BI is a fantastic reporting tool that offers endless customisations for valuable insights, but in the world of business we don’t always have time to manually go in and check a report.
Luckily, Power BI has a feature that solves this very problem.
Say ‘Hello’ To Power BI Report Subscriptions!
Report subscriptions allow you to automatically send report updates to multiple participants whenever, or wherever, they are.
You can set the criteria to be based on a specific time, such as weekly, or whenever the data in the report changes. But how do you do subscribe to a report? Here’s a step-by-step guide!
Setting Up A Report Subscription
First and foremost, login to your Power BI account if you haven’t already done so (https://app.powerbi.com for anyone unsure). Once you’re in simply navigate to the report you want to subscribe to in the “Workspaces” or “Apps” section, open it up and follow these steps.
- Click the “Subscribe to report” button which is in the banner at the top

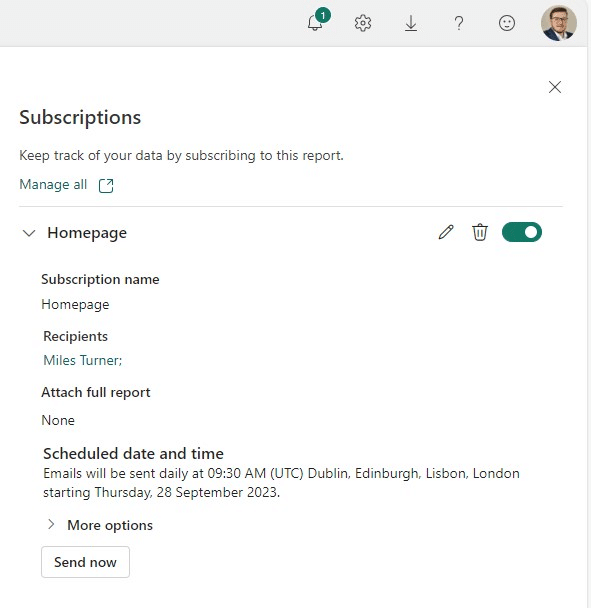
From here, you should see a screen like the one to the left, except in place of all of that information, you’ll have a button which says “Create a subscription” Give that a click.
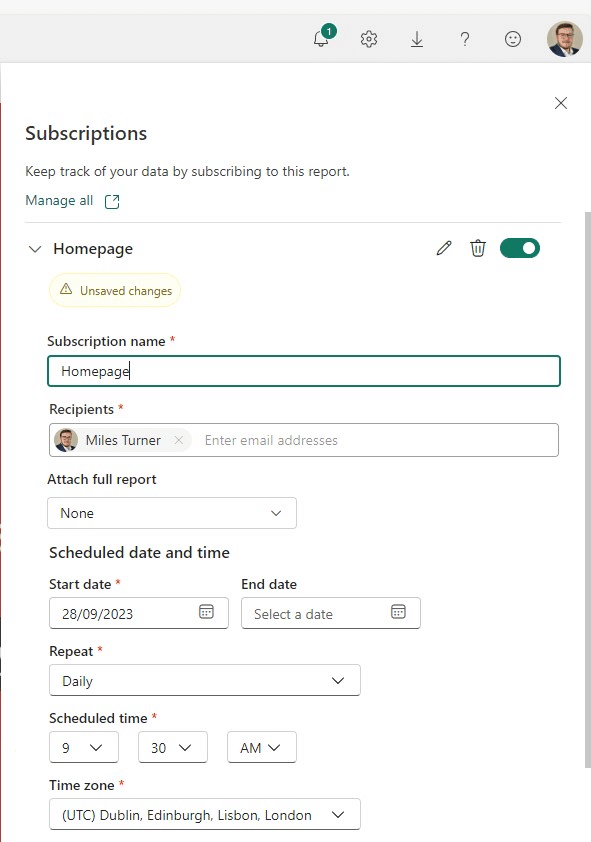
From here you can configure the subscription settings:
- Recipients: Enter the email addresses of those who want notifications (only an option if you’re choosing email delivery, more on that below).
- Frequency: Select how often you want notifications to come in, such as weekly, daily, or only on specific days of the month.
- Time: Enter what time of day you want these notifications to come in.
- Time Zone: Select what time zone you, or the person you’re subscribing for, is in.
- Start Date: Select when you want the notifications to begin.
After you’ve selected that, you can now select whether you want the full report to be emailed to you (only available to those with a Power BI Premium account), or a link to the report (which requires a Power BI Pro account).
From this window, you can also add a message to be included with the email containing report updates, however this is optional. If you don’t want a message attached, just leave this bit blank.
Now, just double check all the settings you’ve chosen and once you’re happy, hit “Subscribe”
You can also manage your subscriptions by clicking on your profile picture in the top right of the page, and selecting “Settings”
From here, you can view, edit or delete your existing subscriptions, should you need to.
Et voila! You’re all done. You’ve successfully subscribed yourself and others to a Power BI report, and you’ll receive updates in accordance with the frequency level and delivery method you’ve chosen. No more needing to login to Power BI multiple times a week just to double check a report!
